How to Deploy PostgreSQL in Docker for Local Development
When working on modern applications, having a reliable and consistent database environment is crucial for local development. Setting up PostgreSQL directly on your machine can sometimes be cumbersome 😩, especially when dealing with different versions, dependencies, or conflicting configurations.
Docker provides a simple and efficient way to run PostgreSQL in an isolated container, ensuring that your local setup remains clean and reproducible across different environments.
☕️ It’s a cozy Sunday afternoon, the perfect time to tinker with some tech setups.
In this guide, we will walk through the process of deploying PostgreSQL inside a Docker container for local development. You’ll learn how to build a custom image, configure environment variables, and run a container that can be easily accessed from your host machine. By the end, you will have a ready-to-use PostgreSQL instance that integrates seamlessly with your applications, without the hassle of manual installation and configuration.
1. Create a “Dockerfile”
Next, you create a Dockerfile that acts as the blueprint for your custom PostgreSQL image.
In the Dockerfile, you define the base image, configure environment variables, expose the required ports, and include any initialization scripts. Each instruction tells Docker exactly how to construct the image.
When you write a Dockerfile, you guarantee that every build produces a consistent and reproducible environment. This practice simplifies setup, prevents configuration errors, and allows your team to share the same development environment across different machines with ease.
sandy@McPro postgreSQL % ls -al
total 16
drwxr-xr-x  4 sandy  staff  128 Sep  6 23:23 .
drwxr-xr-x  6 root   staff  192 Sep  7 09:52 ..
-rw-r--r--@ 1 sandy  staff  307 Sep  6 22:05 Dockerfile
sandy@Sandys-McPro postgreSQL %
Below is the content of Dockerfile.
# Use official Postgres image
FROM postgres:14

# Set environment variables (default user & DB)
ENV POSTGRES_USER=user
ENV POSTGRES_PASSWORD=password
ENV POSTGRES_DB=keymgr

# Expose default PostgreSQL port
EXPOSE 5432

# Optional: copy initial SQL scripts
# COPY init.sql /docker-entrypoint-initdb.d/
2. Build an image
After you create the Dockerfile, you move on to build the image. When you build an image, Docker processes each instruction in the Dockerfile and packages them into a reusable image.
The image includes everything you need to run PostgreSQL, such as :
- Base operating system
- PostgreSQL binaries
- All the configuration you defined
By building the image, you establish a consistent environment that you can use to launch containers anytime.
This approach ensures that developers spin up PostgreSQL instances reliably without repeating manual setup steps.
Run the following command to build the image, it still on the same path as well :
$ docker build -t postgre-server-image:14 .sandy@McPro postgreSQL % docker build -t postgre-server-image:14 .
[+] Building 29.2s (6/6) FINISHED docker:desktop-linux
=> [internal] load build definition from Dockerfile 0.0s
=> => transferring dockerfile: 346B 0.0s
=> [internal] load metadata for docker.io/library/postgres:14 29.1s
=> [auth] library/postgres:pull token for registry-1.docker.io 0.0s
=> [internal] load .dockerignore 0.0s
=> => transferring context: 2B 0.0s
=> CACHED [1/1] FROM docker.io/library/postgres:14@sha256:df734e97e2aed1a5d03b9b0d2fede9faf5bea9d1ad0c15a3c469ac303e681084 0.0s
=> => resolve docker.io/library/postgres:14@sha256:df734e97e2aed1a5d03b9b0d2fede9faf5bea9d1ad0c15a3c469ac303e681084 0.0s
=> exporting to image 0.1s
=> => exporting layers 0.0s
=> => exporting manifest sha256:c9d0b9e7e819aee6684ca740e4f4d5703b201ec2d864bae63db7082becc82c58 0.0s
=> => exporting config sha256:2372e1024a4bab1048a4b99c64003e75f8b2d3fe0a8f645072829833f84bd448 0.0s
=> => exporting attestation manifest sha256:1803bc0d942299e604d38a75c3f7cf031db6f8bd13d7da9624724e401b2d17ba 0.0s
=> => exporting manifest list sha256:93a5a82338902dbd80dd63a52ecd4634cc2a5aa7beb99cb26cf8f370c88583f1 0.0s
=> => naming to docker.io/library/postgre-server-image:14 0.0s
=> => unpacking to docker.io/library/postgre-server-image:14 0.0s
1 warning found (use docker --debug to expand):
- SecretsUsedInArgOrEnv: Do not use ARG or ENV instructions for sensitive data (ENV "POSTGRES_PASSWORD") (line 6)
View build details: docker-desktop://dashboard/build/desktop-linux/desktop-linux/r5lwtoykaxwhtrm5buu9g433k3. Build finished – Docker image generated.
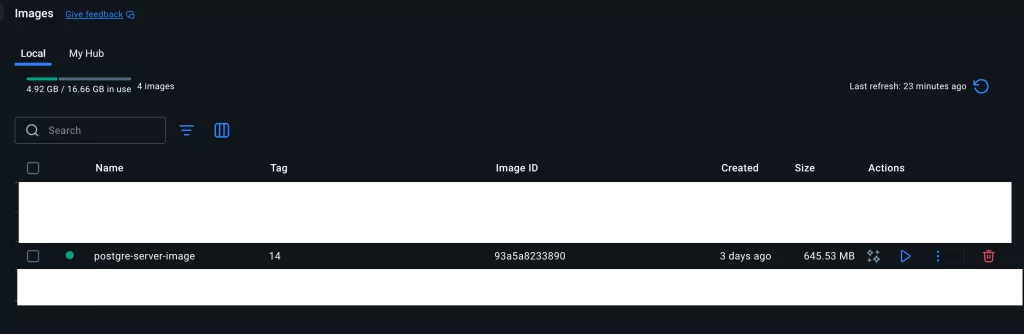
Boom! The build is finished and your Docker image is ready to roll 🚀.
4. Running a Container from a Docker Image
After you build the Docker image, you run a container based on it. A container gives you an isolated environment that includes PostgreSQL along with all required configurations and dependencies.
When you start the container, you essentially launch a ready-to-use PostgreSQL server without installing anything directly on your machine.
You map the container’s internal PostgreSQL port to a port on your host system so you can connect to the database from outside the container.
This setup lets you manage PostgreSQL just like a local installation, while keeping everything clean and easy to reset whenever you need.
$ docker run -d \
--name pgsql-server-container \
-p 5433:5432 \
-v ~/pgdata:/var/lib/postgresql/data \
postgre-server-image:14
At this point, the service is configured to listen on port 5433 of the host machine, which is mapped to port 5432 within the Docker container.
So, when the container is running, it will look like.
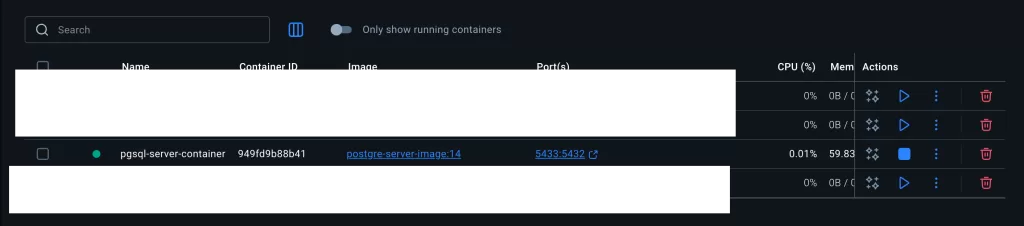
You can see under Port(s) column is 5433:5432
Now, you can use localhost and port 5433 from your application to connect to postgresql database.
5. running docker console
If you want to access the console of a container you’ve already installed, run the following command:
$ docker exec -it pgsql-server-container bash6. now, give it a try to connect from pgAdmin
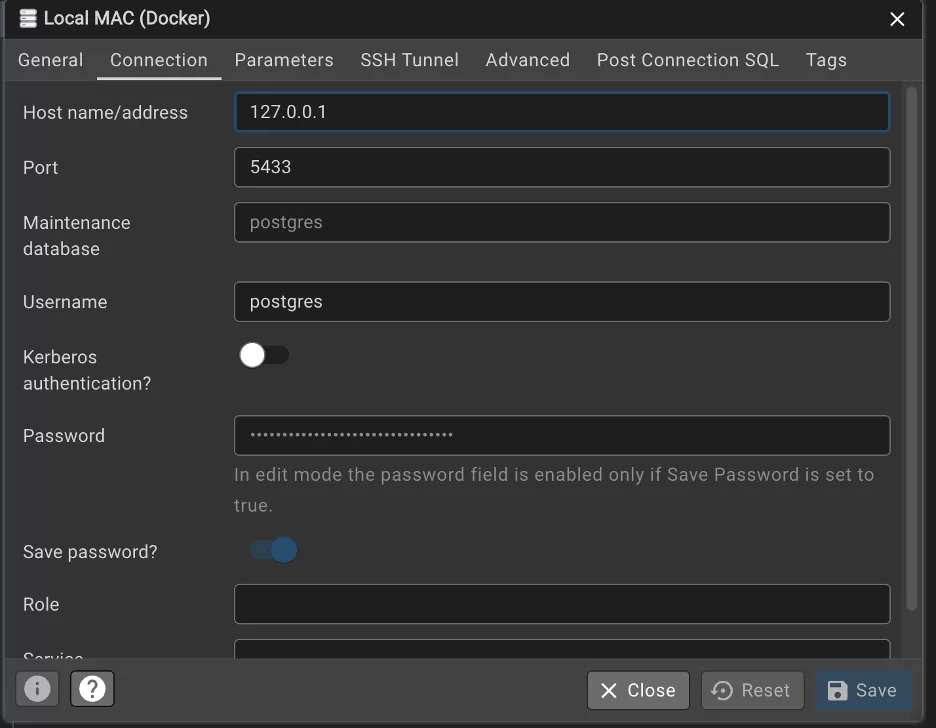
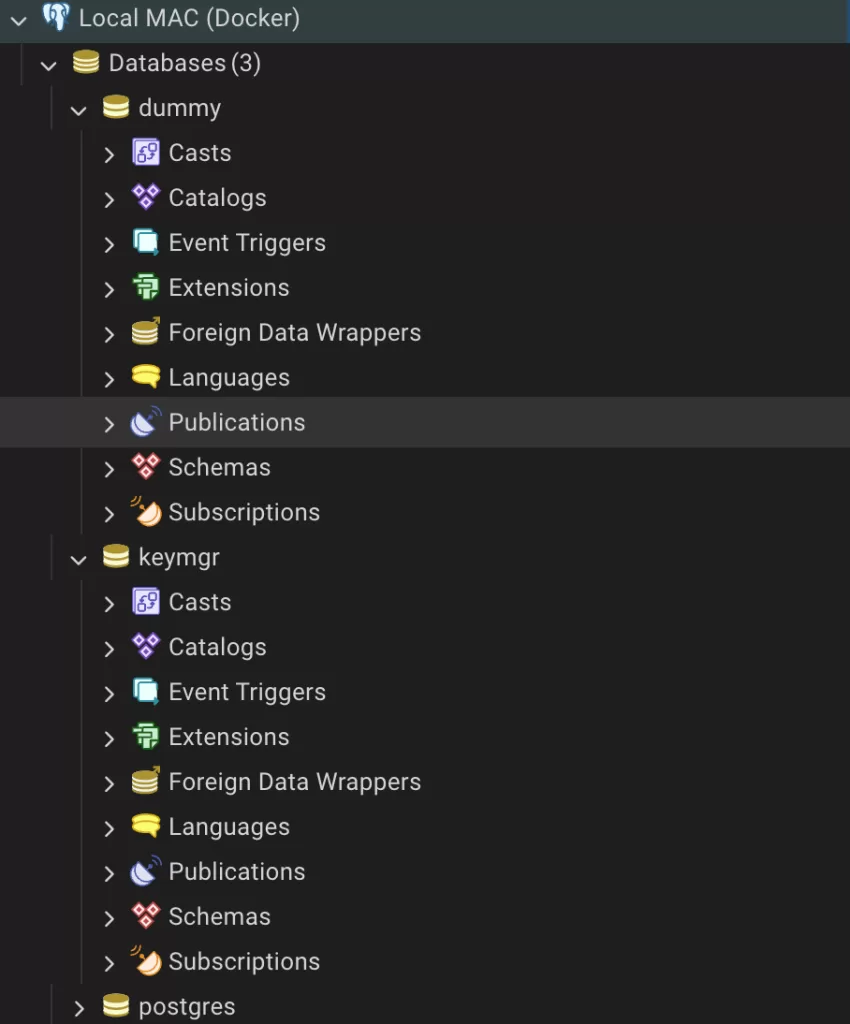
With your PostgreSQL container running, open pgAdmin and create a new connection.
Enter the details you defined when starting the container such as the hostname (localhost), the mapped port (in this tutorial, we are using : 5433), the username (postgres), and the password you set.
After you connect, you can browse databases, run SQL queries, and manage your PostgreSQL instance through pgAdmin’s interface.
This approach lets you handle database administration in a clear and user-friendly way.
Note :
Tested on macOS Sequoia (v.15.6.1) using Docker Desktop
If you’d like to explore more of my notes, feel free to check out my other sections on code, databases, and even management – all still connected to the broader world of technology.
That’s all for now, folks! Keep learning, keep building, and most importantly enjoy the journey! 🥰😍